Face Art | Creative Makeup Tips

Time to get creative…
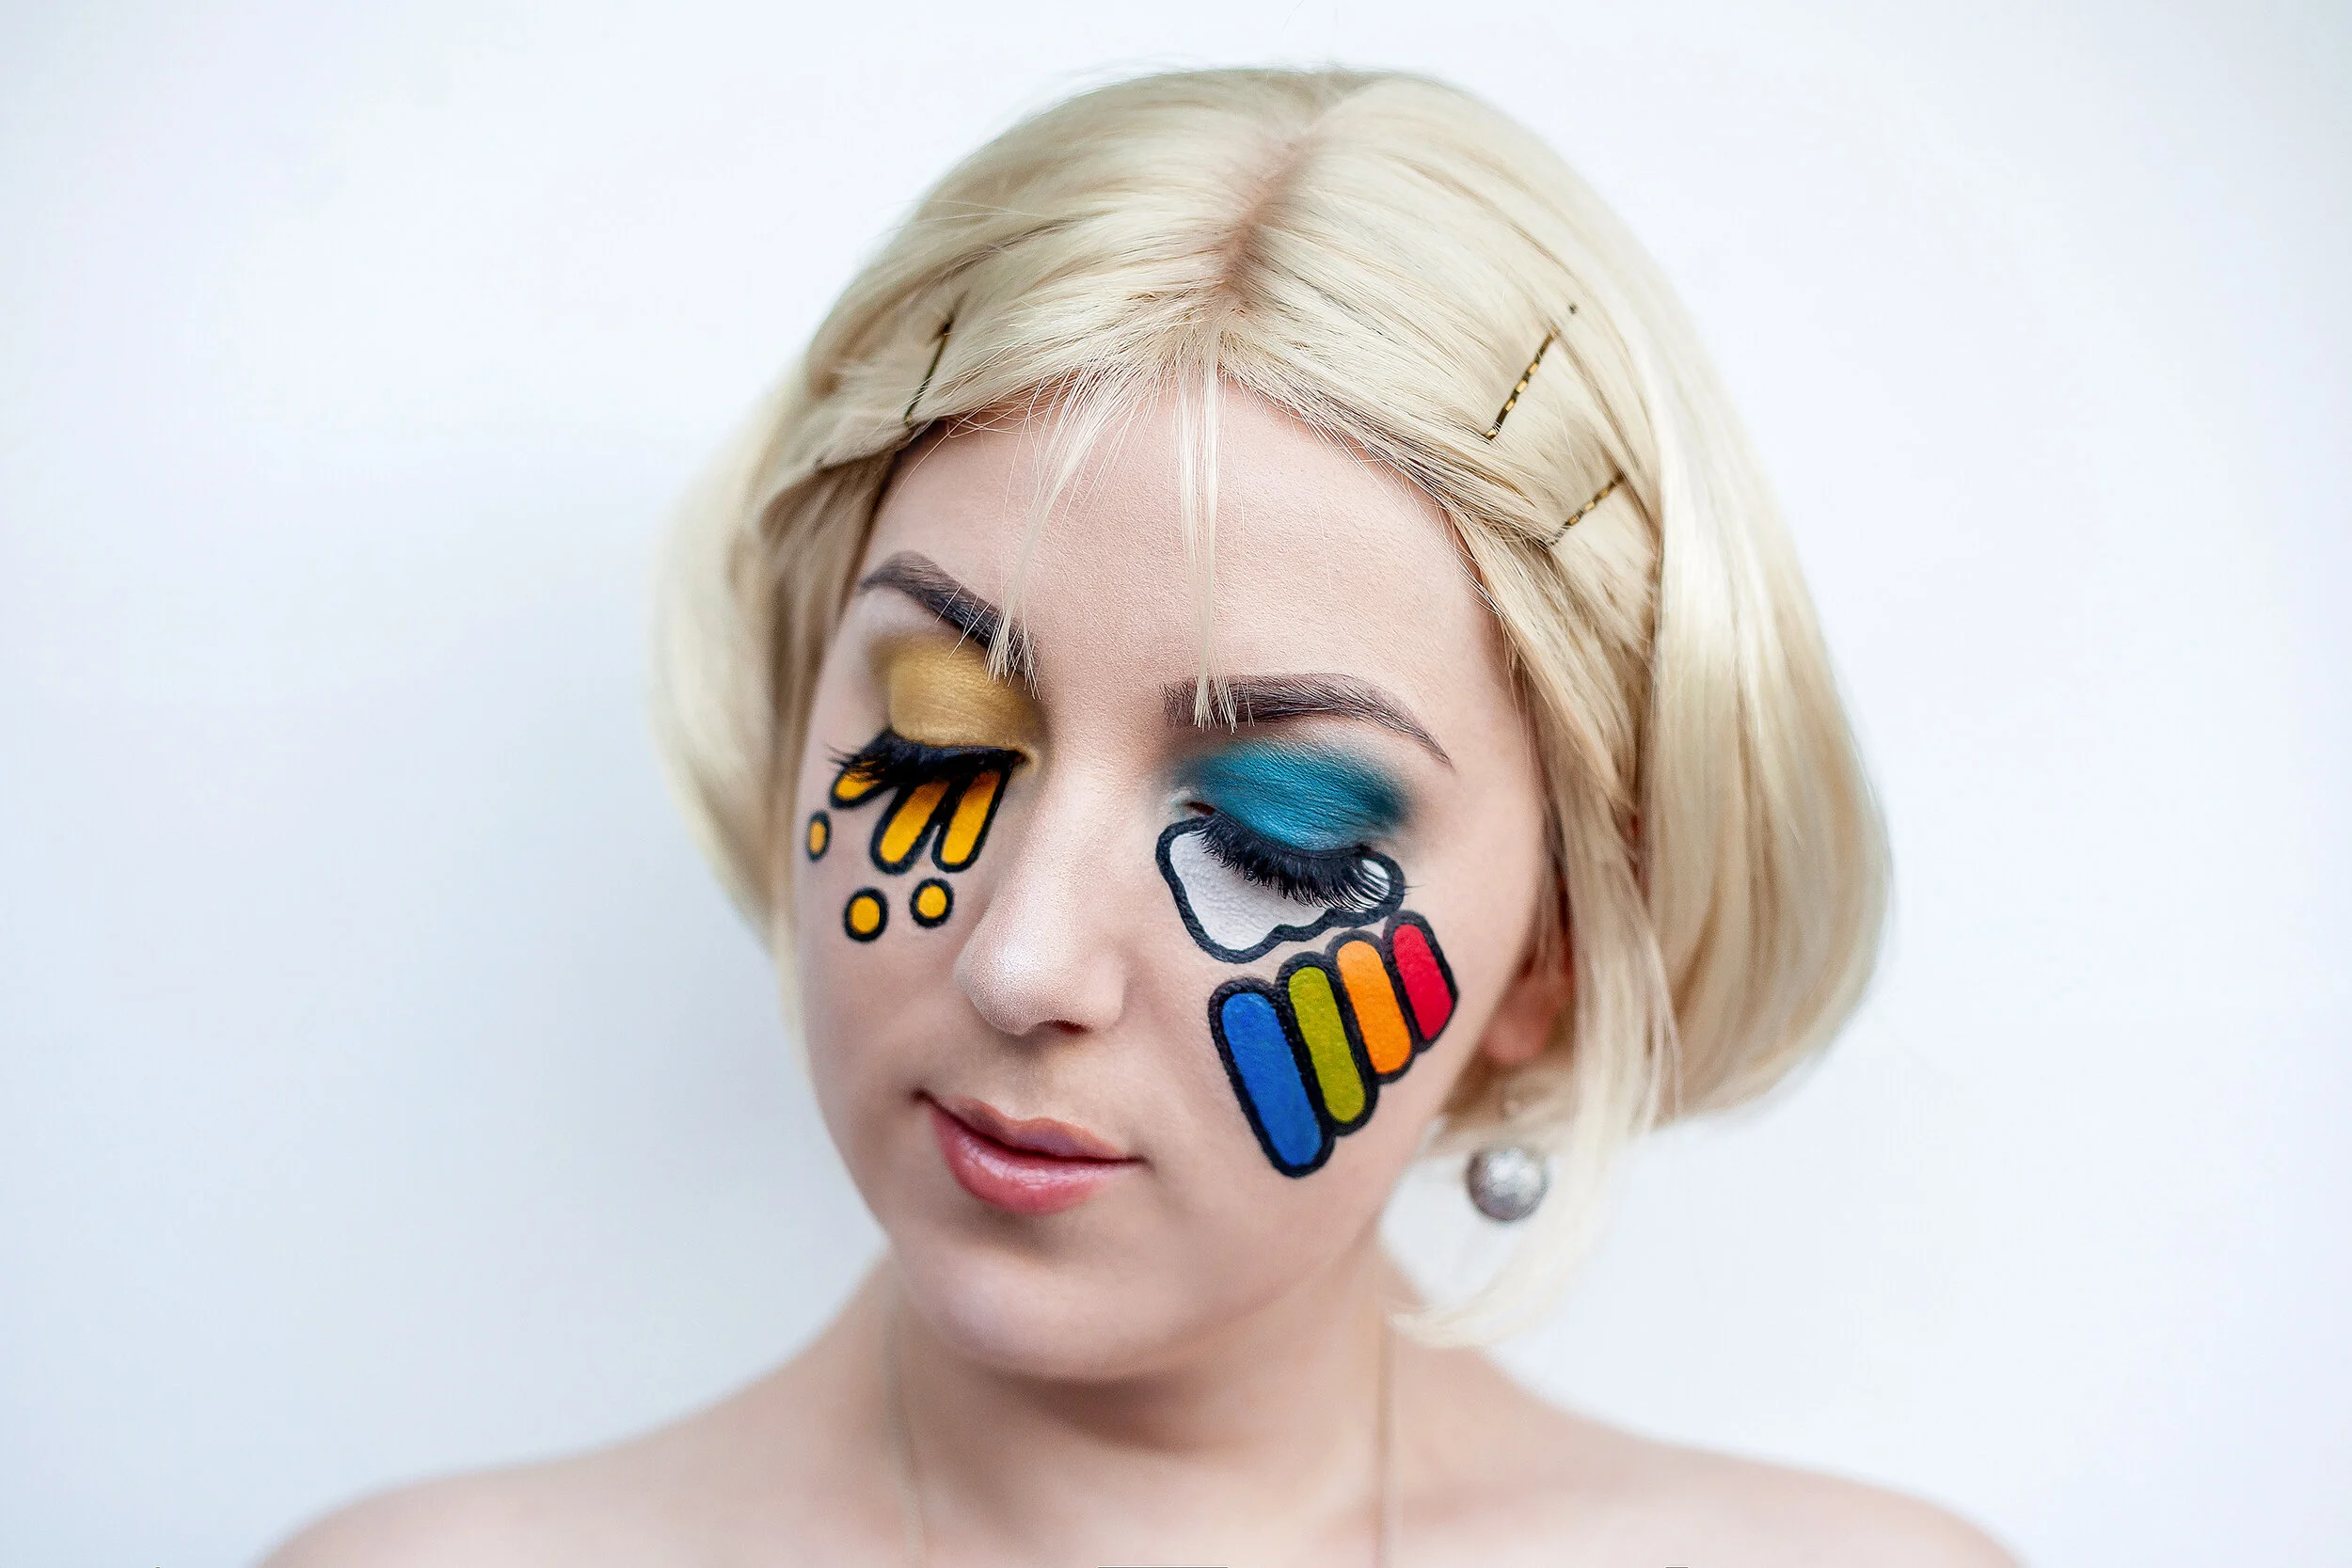
I’ve been doing a new look for Makeup Monday over a number of months now, and after creating a multitude of wearable looks from natural to glam sometimes it’s exciting to make something different, adventurous and fun! This look was inspired by makeup by ‘Visible June’ on Instagram, and I have been a big fan of her work which varies from dark SPFX to fun to dynamic surrealist looks. In this post I share with you three tips for creating beautiful face art!
Above: Jewels handmade by me, MOTD inspired by ‘Visible June’.
Face Art | Creative Makeup Tips
Tip #1. Use Quality Products
Some of my first experiments with creative makeup using face paint were a little tricky, mostly because I was using products that didn’t work as well as I’d have liked. In posts like ‘How To Prepare For A Photoshoot’, I used white face paint from my local craft store instead of investing in a professional, quality product. This affected the coverage and application of the white eye flicks in the post. High quality face paint has strong thick coverage, long wearability, smooth consistency, bright colour, and are easy to blend. If you’re looking for a great brand I recommend checking out the ones available with BodyFX in Auckland, New Zealand. I cover the details of ‘Face Art’ the name of the face paint, and palette I use in my previous post ‘Paint Me A Rainbow’. Quality products will also last longer, as you need to use less product for a great result. They’re also far more comfortable to wear, especially around the eyes as I have used them for painting eyelashes temporarily in other Halloween makeup looks like ‘Makeup Magic’.
Tip #2. Start Small
It’s easy to be tempted by the incredible face art makeup looks on Instagram, and some incredible artists including my favourites like @porcelainette, @beautsoup, and @meicrosoft however, it’s better to start small and focus on understanding your products, using them to their potential and creating quality over quantity in the beginning. I started with adding face art on aspects of my makeup looks, only around the eyes, a little addition here and there rather than my entire face. When it’s done well, like @abbyroberts does in can be incredible. But artists with her level of professional skill and application are rare, and when her complex creations are recreated at a lower quality it doesn’t do them justice. Like with all skills, start small and build on what you know!
Check out more makeup videos on my Twitch page, and the finished look before and after below ♡
Tip #3. Apply Light to Dark
Face paint is so much fun to play with but there are a few things to be aware of. The biggest one is application sequence, start with the lightest colours like white, yellow, and pastels that can be easily muddied. Then move on to darker colours with black always last, preventing it from blending with your work and making it messy! I learned this the hard way, and can’t stand by this tip enough. I also like to focus on utilising face art on certain parts of my face that are easier to work with like my outer cheeks and eye area. Lips and brows can be difficult to get the right coverage and are easily smudged. I am looking forward to expanding my work with face paint and integrating into more of my makeup looks to come!
Makeup Monday | Follow Me!
Watch full live streams on my twitch.tv channel: www.twitch.tv/thewardrobeblog ♡
You can also follow me on instagram and Facebook for more updates and inspo!
Before - Makeup Monday
After - The finished look!
The Photoshoot
I admit, I was a little unsure how this look would turn out. Now that it’s complete I really love it, it’s so different from what I’ve created in the past and well out of my comfort zone! and while I was painting my face with crazy colours I was worried I had made a huge mistake… However when it was finished I really like the bold bright colours, I kept the lips simple to highlight the eyes. 90’s hair is perfect to finish it off, and it’s got me excited to try other imaginative shapes and colours for creative makeup next time!
My Favourite Part
My favourite part of this face art makeup look, is how balanced the two sides look together! It was something I wasn’t sure about, especially the different colours around my eyes but I feel like it’s the most dynamic aspect of this look and makes it so much more interesting than a symmetrical one. I did this look free hand, and am pretty happy with how that worked out too. I’m excited for next Makeup Monday! See you there!
Makeup Monday on Instagram | www.instagram.com/thewardrobe.co.nz ♡
Like this post? Follow me on Instagram, Facebook, Twitch, and Pinterest! ♡
Living the creative life in Christchurch, the south island of New Zealand with adopted family of pet pigeons, rescue hedgehog, and Mashmello the ringneck dove as featured on Ellomashmello.
Katherine is the New Zealand creator of ‘The Wardrobe’ and face of the blog & shop. Artist of wonder for ‘Katie Marvel’ the whimsical slow made fashion label, she is also the owner & photographer of portraiture, places and projects for ‘The Undefined Photography’ and maker of music for ‘Kaatje’.
The editor of The Beauty Blog New Zealand, she is the curator of multiple creative online communities including Slow Made Style, New Zealand Creators, and Pusheen The Cat Loves fan community with more to come...


