The Creative Process

Prepare, Incubate, Illuminate, Evaluate, Implement…
Inspiration can seem like a mysterious concept, it can visit you unexpectedly at 1am in the morning like it did with me! So what is the creative process to becoming inspired, and how can it work for you? In this blog post I share with you the creative process behind this Easter look including my research, outfit, styling, makeup, and photography. I break down what the five steps of the creative process are, and how I use them. I share with you what inspired me, link to the live ‘get ready with me’ video I filmed on Facebook of this makeup look from start to finish. Plus three tips and tricks for getting the most out of the creative process!
The Creative Process
Behind the scenes | My Creative Process
#1. Prepare | Research and explore the problem…
When I start any new project, gathering new inspiration is key to creating new material. Luckily in this day and age it’s super easy! The method I most often use for exploring, researching and preparing for new ideas is visualisation. Before I get to this stage I start each photoshoot off with an overall concept in mind and based on particular colours, themes or objects I use these as a spring board for new ideas! When I started this project one of the key items that I was inspired by were a pair of pastel, Easter Bunny sequin ears I bought from Kmart. I have wanted to create a new look to match them and this dillemna was key in propelling some creative problem solving! Pinterest is a big tool I often use to get me started in creating a clear visual image in my mind of what I want to create, and I post all my makeup, styling, and photoshoot inspo for you to follow below!

Above: Check out all my inspiration for photoshoots, makeup, and fashion on Pinterest!
#2. Incubate | Think on it!
I spent a significant amount of time thinking on an Easter themed photoshoot before I came to any significant ideas. Sometimes it takes me a little while, sometimes longer. I don’t continue until I know I’ve reached the next stage and the light bulb is illuminated! Once I had looked at other pastel makeup looks, pastel easter makeup, and pastel easter designs, I spent some time think about other aspects that would connect to the ears such as potential outfit, backdrop, and overall aesthetic I would be aiming for. These are all questions I considered before coming to any solid ideas.
#3. Illuminate | Generate ideas and solutions…
It’s one of the best feelings, you’ve been dwelling on a problem or contemplating a new project but you haven’t thought of “it” yet, then all of a sudden it comes to you! This stage of the process I try to extend as much as possible, I don’t settle until I have a really solid idea or a number of vague ones. I started with a pair of bunny ears, and decided on a white outfit soon after. That led me to conclude that a pastel makeup look would work well… and then it was just a matter of working my way down my list of creative questions for this project… The last and most difficult problem I had was how I would customise my outfit on such a simple contrasting backdrop with an aspect that would be super eye catching! Cute ears are great, and a cohesive outfit is also great but I wanted to create a look that was also something different, yet undeniably Easter themed! This led me to the next stage…

The Easter Ears from Kmart that inspired my initial ideas.

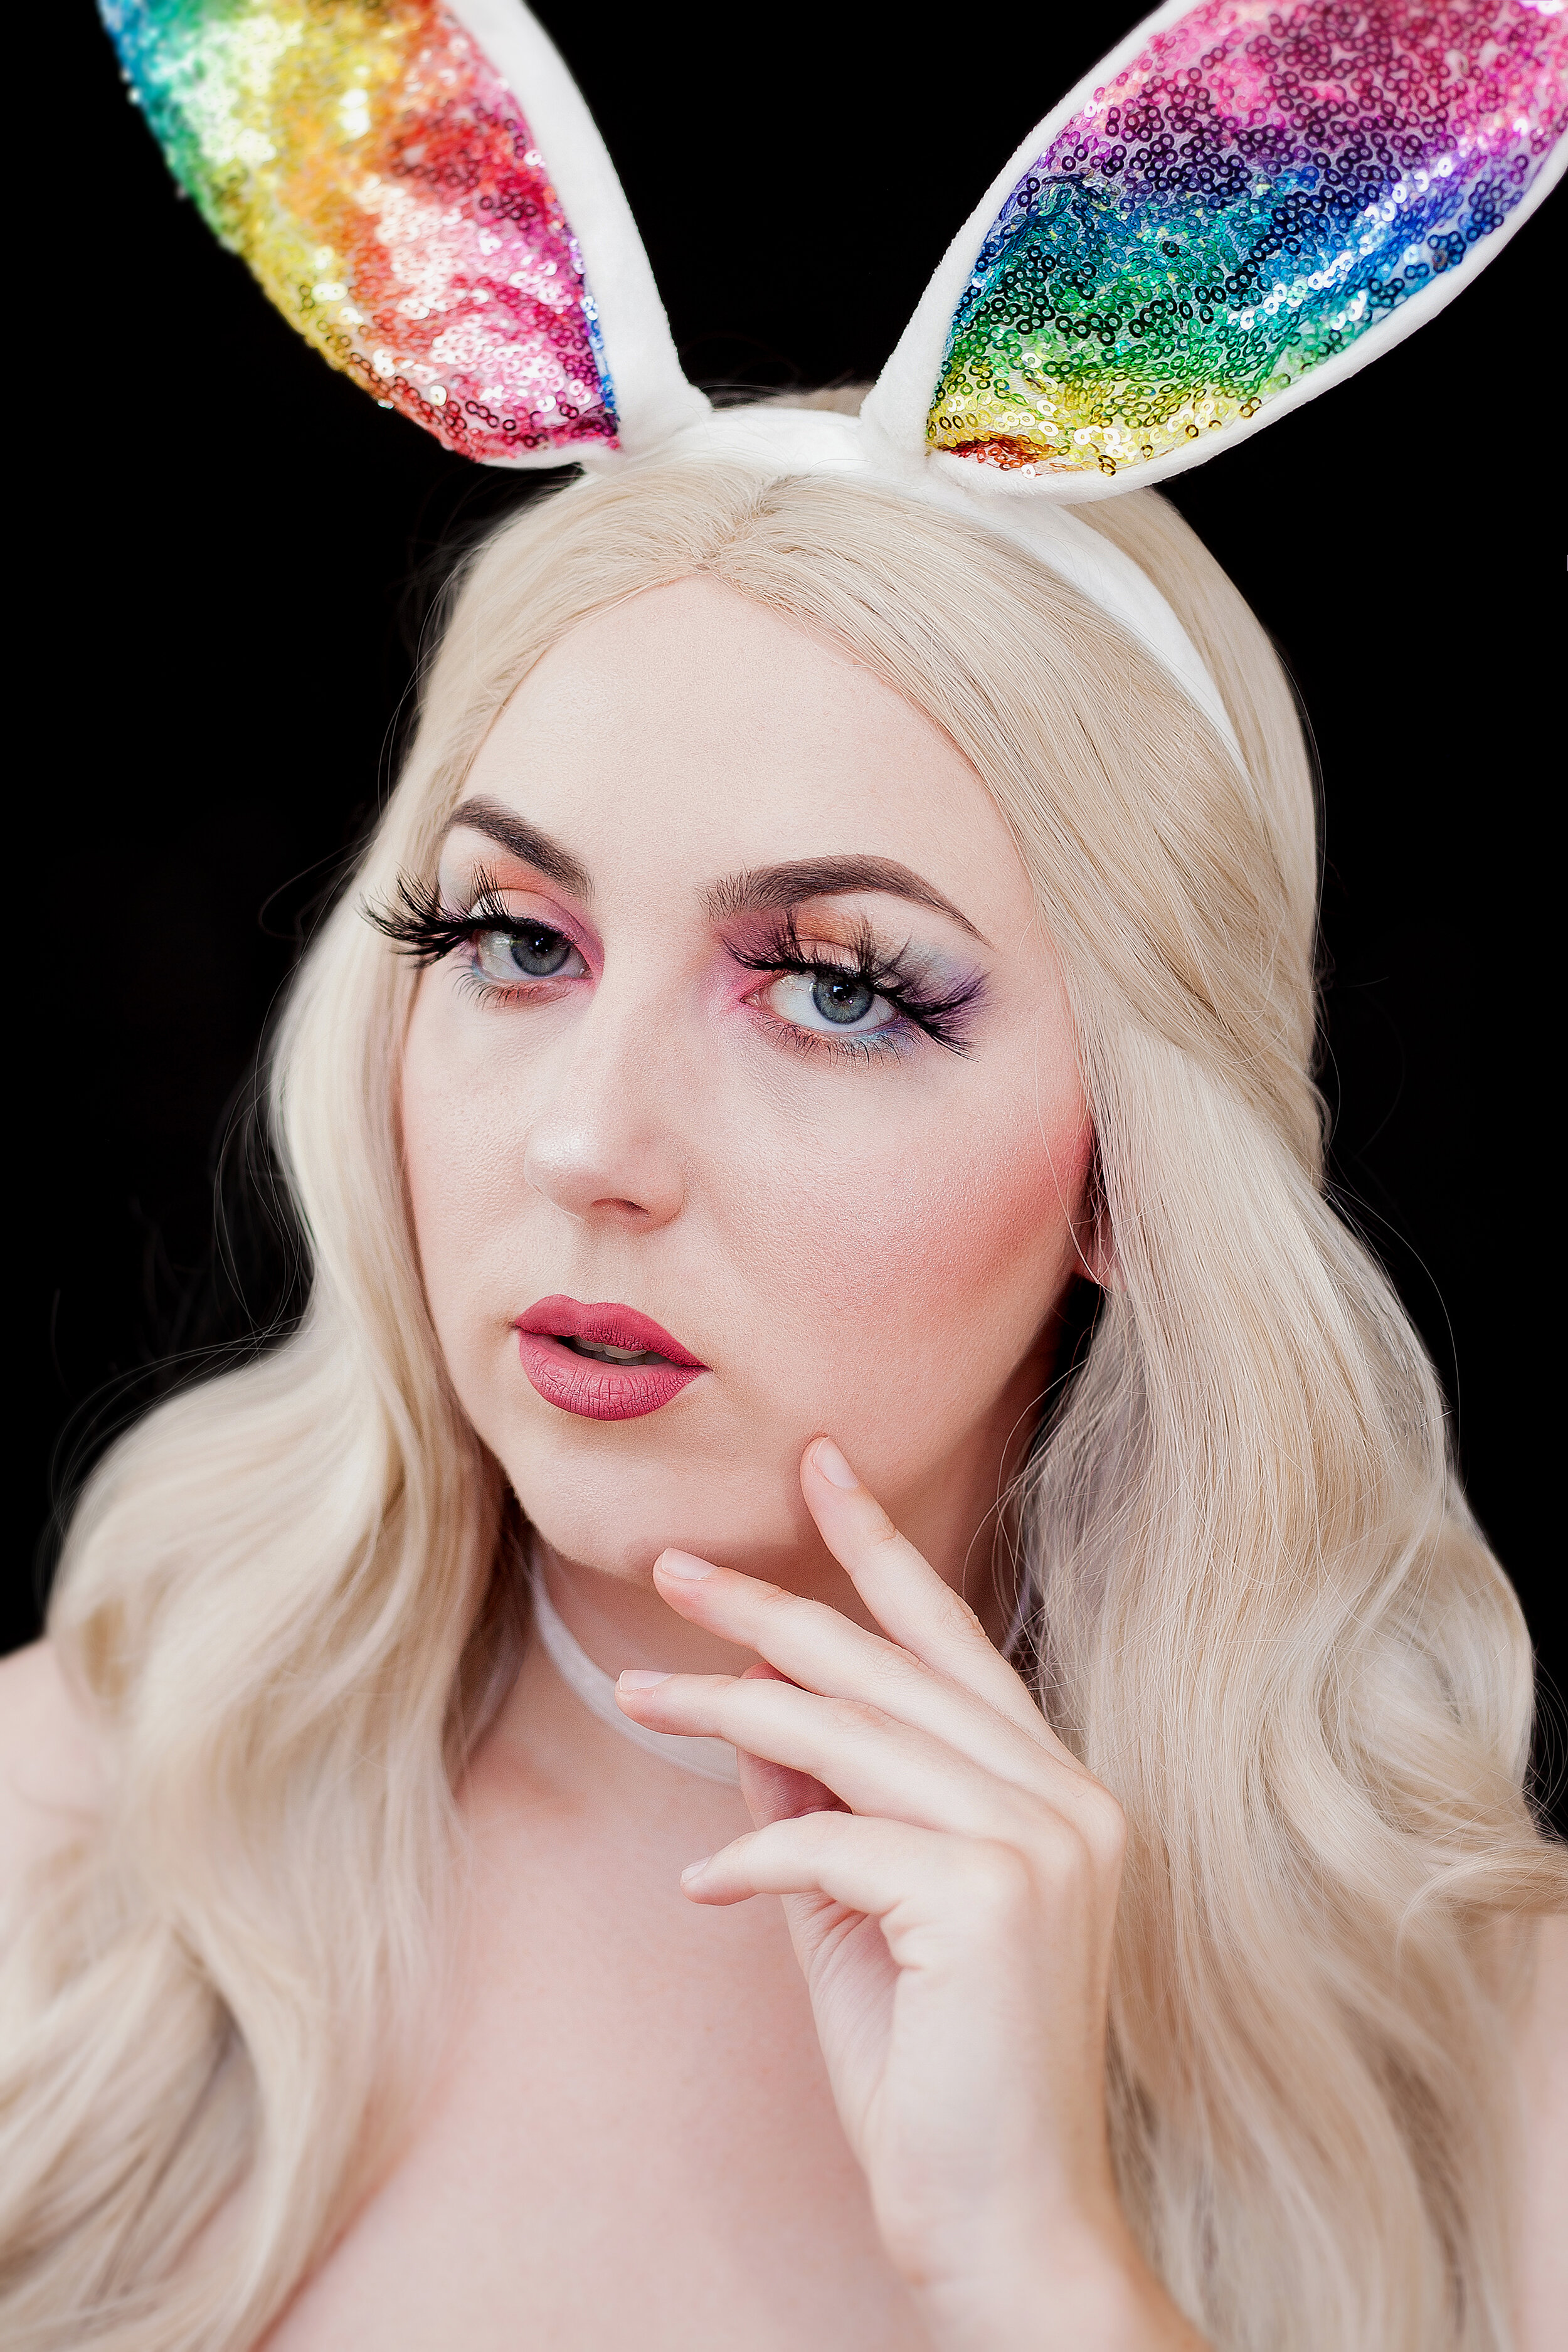
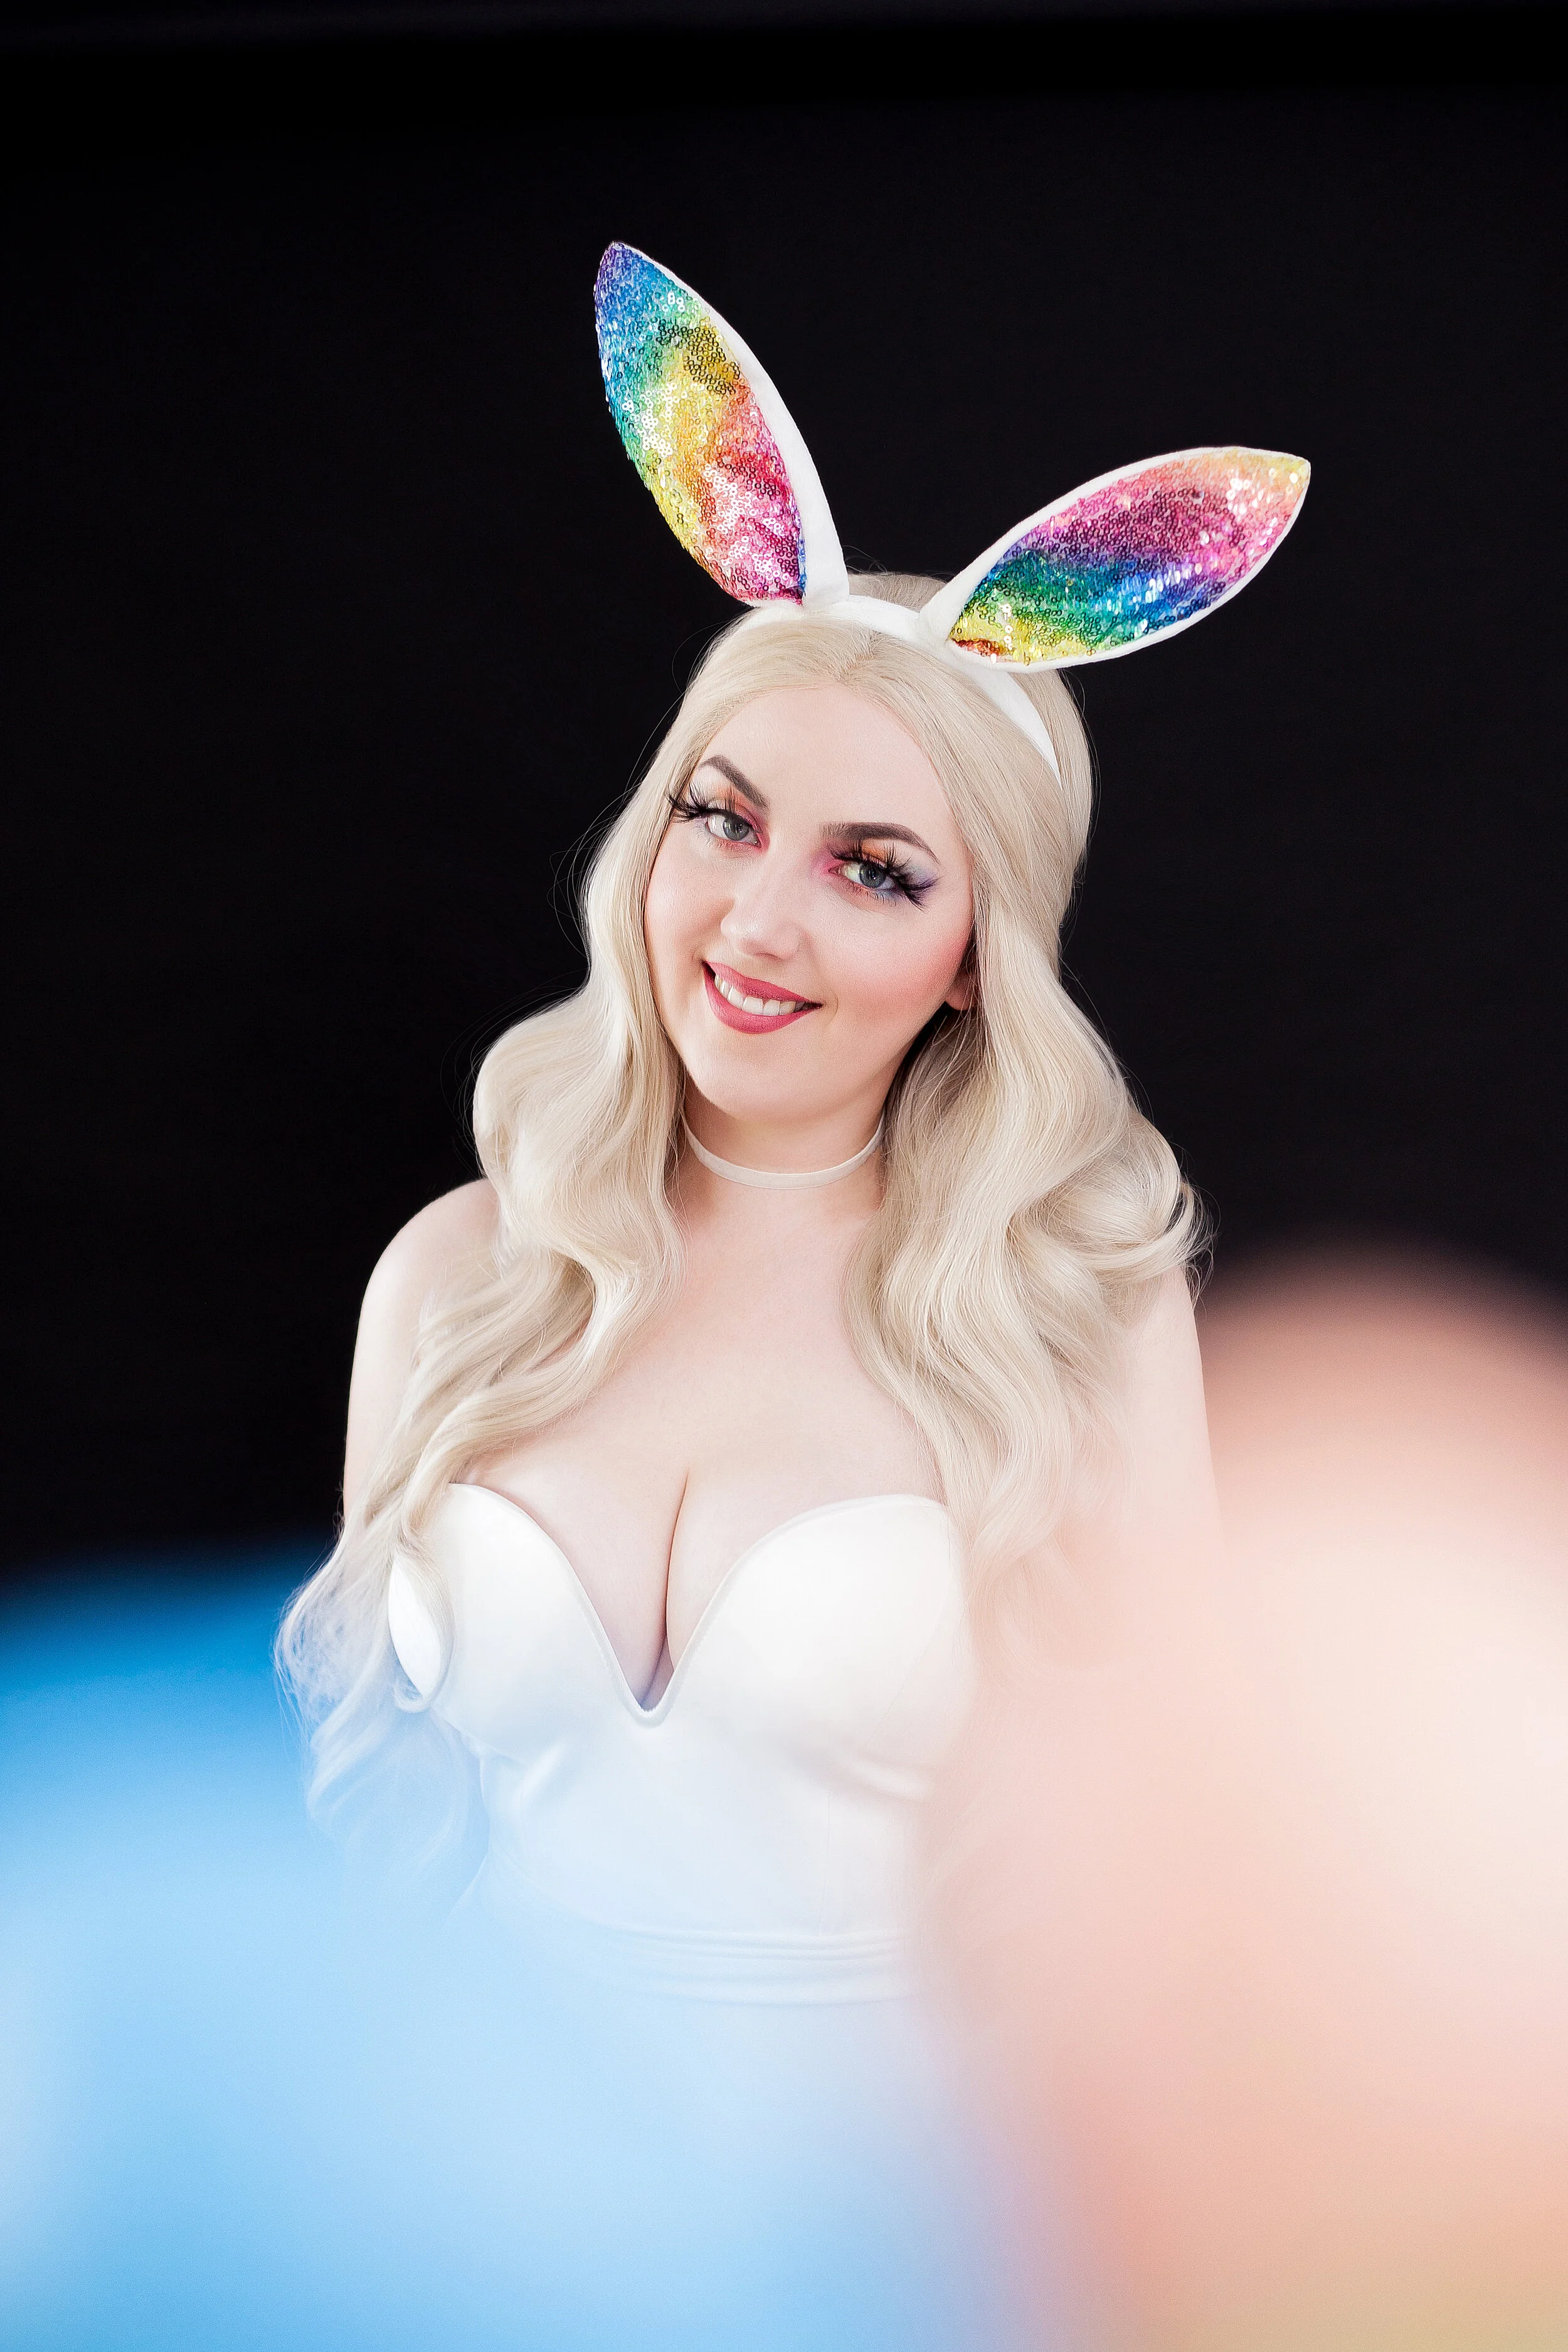
Finished makeup and styling!

The intiial results of the photoshoot…

Above: The finished results of this Easter bunny photoshoot!
#4. Evaluate | Reflect and critique possibilities…
Once i had a number of solid ideas, it was a matter of comparing, contrasting and considering them all. Evaluating ideas requires as much visualisation, if not more than the initial stage of the creative process. Once I have an idea or a selection, I run them through my mind and contemplate potential outcomes, including the risks and benefits, and how factors such as time constraints, my budget if any, any stakeholders such as outside opinions on the result, and my own personal goals that I have set for the project including attributes such as originality, simplicity, difficulty level, and how familiar I am with the concept I am considering undertaking. To create a great end result, this stage takes longer than the final stage if it’s done correctly. It was during this part of the project that I realised I could utilise my skills for dying wigs and custom dye an aspect of my outfit to match the pastel rainbow theme! I am a big fan of white stockings, so using a pair in my wardrobe I knew that the bright vivid acrylic shades would soften to pastel tones once dry… It was just a matter of testing it to be sure! This was the final stage of my evaluation process, and as you can see below it worked out super! Once my custom pastel rainbow stockings were dry, I knew I had the idea solidified and it was just a matter of putting it all together!


#5. Implement | Adapt and action ideas…
Once I have a blue print in my mind for what I want to achieve, I start creating it in reality. After a 1am test dying my stockings in the middle of the night the day before, I jumped straight into shooting this look the next day while it was fresh in my mind, and I was feeling super pumped about it! Often I will test ideas in small ways before I commit fully to a project, generally at the evaluation stage. This stage of the creative process is so much fun, and extremely rewarding to bring my imagination into reality! Using my initial Pinterest research for makeup, put together the makeup look to match my ears and stockings, bringing it all together, success!

Before Makeup on Facebook Live

After Makeup on Facebook Live
Behind The Scenes | The Photoshoot
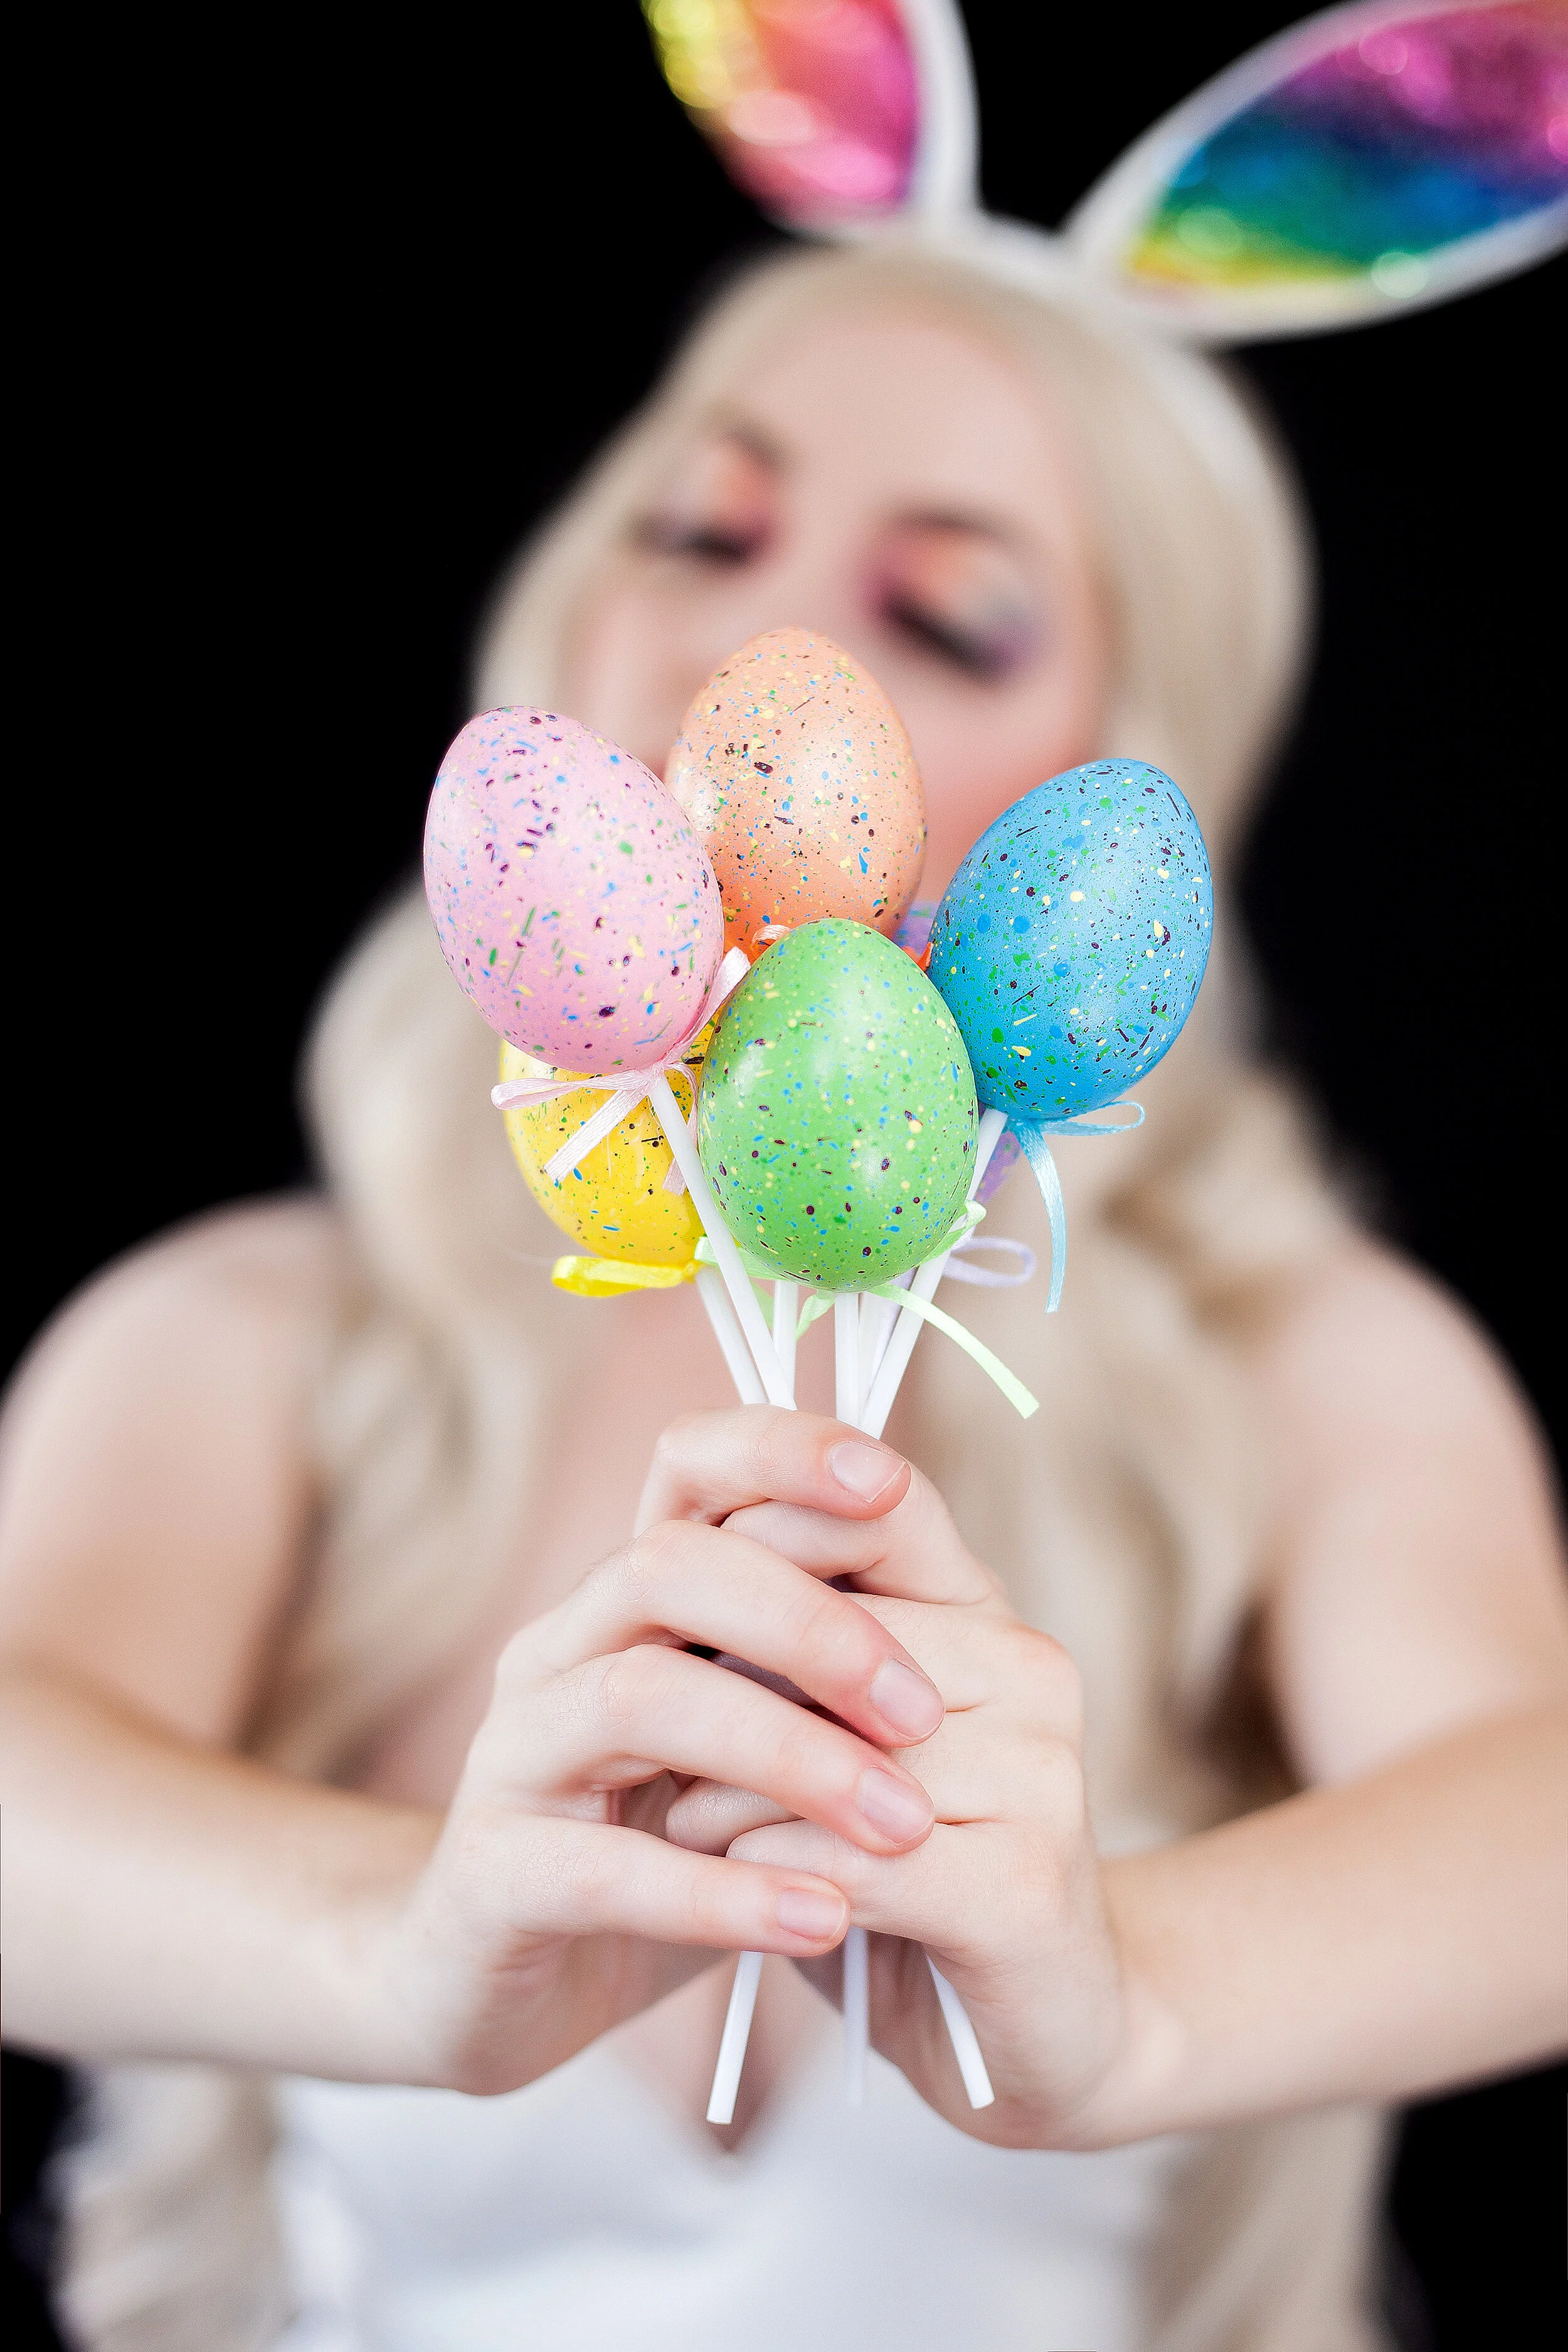
I initially struggled to decide on what background I was after. With so many colours happening in my outfit a spring themed location shoot was out of the question, and choosing a coloured backdrop was difficult to choose with so many colours in this look. I finally decided on a black backdrop, when in doubt go for stark contrast! Although I was hesitant about it, being Easter and all I like how it turned out and the outfit really pops! My favourite aspect of this shoot are the props I used, little pastel decorative Easter eggs from my local supermarket, the perfect addition and easy to work with and hold. Enjoy!


Three Tips & Tricks | The Creative Process
Tip #1 - Be Patient. Patience is a virtue, or so they say! I am one of the most impatient people I know especially when it comes to anything I am passionate about. Despite it being difficult to take my time, I often find that giving myself creative breathing room and taking time away from a project, then returning to it later helps me refine my ideas, and get a clear picture of my goals for the project. The trick is: Define the creative question you want to answer, i.e. “How do I create an Easter outfit?” then take some time to let your mind mull it over for a day or so before returning to brainstorm answers! For me, the answer was simple - Be the Easter Bunny!

Tip #2 - Simplify. It’s easy to get caught up the excitement of a new creative project, and be swept away in all the many details - in the process overwhelming yourself with too many plans or too much complexity to realistically achieve. I continuously find that the most successful creative projects I do are the ones in which I have simplified my process, simplified my ideas, and simplified my goals. Creating limitations forces your mind to think outside of the creative box, and ironically I come up with my best ideas whenever I am limited by various obstacles - whether they be time contraints, location, weather, you name it! The trick is: Keep the number three in mind when creating. For me it was three main colours, three main goals, and three poses! From this you can always expand, but keeping it simple means better quality content every time!

Tip #3 - Plan, Plan, Plan. Planning wasn’t always so hot on my to-do list, and there was a time when I would dive into creative projects cold - without researching anything in order to make it happen now! Unfortunately although my ideas were great, the execution of these projects was almost never to the standard I hoped for, and the results were often disappointing. To get inspiration, and to keep your inspiration you need to find a balance between generating ideas, getting excited and also maintaining realistic expectations for yourself, and working to your strengths. By doing this you will generate more good feelings associated with the project, and buffer yourself from problems, disappointments and set backs! Planning is the key to promoting all of this. The trick is: Research your project, and all the necessary steps fully before starting anything! For me, this meant researching the makeup I wanted, the outfit, the photography style, and how they would work together before I even got dressed! I had the finished shoot in my mind’s eye when I began dying my stockings, giving me more focus, and ultimately more inspiration!

My Thoughts on The Creative Process
It was fascinating for me to reflect on my own process, and I hope you enjoyed reading about my work behind the scenes! I love delving into the psychology of creativity, and breaking down the best ways to get inspired! If you enjoyed this article, I’ve also covered creative block in a previous article ‘Chasing Inspiration’ which you can read here!

Like this post? Follow me on Instagram, Facebook, Twitch, and Pinterest! ♡
Living the creative life in Christchurch, the south island of New Zealand with adopted family of pet pigeons, rescue hedgehog, and Mashmello the ringneck dove as featured on Ellomashmello.
Katherine is the New Zealand creator of ‘The Wardrobe’ and face of the blog & shop. Artist of wonder for ‘Katie Marvel’ the whimsical slow made fashion label, she is also the owner & photographer of portraiture, places and projects for ‘The Undefined Photography’ and maker of music for ‘Kaatje’.
The editor of The Beauty Blog New Zealand, she is the curator of multiple creative online communities including Slow Made Style, New Zealand Creators, and Pusheen The Cat Loves fan community with more to come...


